Author: Lenzlee Wheeler

How To: Adding Links to a Page

How To: Adding Links to a Page

There are 3 types of links available in T4: Section Link, External Link, and Media Link.

I. Section Link

Use a section link when linking to another page in T4.

How To Add A Section Link

2. External Link

Use an external link when linking to another page outside of T4.

How To Add An External Link

3. Media Link

Use a media link when linking to a file in the media library.
(PDFs, Word Documents, Images, etc)

How To Add A Media Link
How To: Using Direct Edit

How To: Using Direct Edit

There are numerous ways to add and modify content in TERMINALFOUR. One way is by using Direct Edit. To add a new piece of content, with internal and external links, follow the steps below.


Steps Adding Content and Links Using Direct Edit:

1. From the Site Structure screen, select Direct Edit from the Actions menu beside the section you just added content to.

2. A Direct Edit screen opens with dotted line surrounding any content for which you have editing rights. A Direct Edit menu is displayed to the left of the screen.

3. Click Insert content to begin adding new content to the page.

4. Select a Content Type.

5. Enter a Name for your content – we will now create a number of links.

6. External Link: e.g. http://www.terminalfour.com.

  • Type the text you wish to use as your link text; e.g. TERMINALFOUR.
  • Highlight the text; then select Insert external link from the WYSIWYG.
  • The Insert/Edit Link Window opens; complete the details as required.
    • URL: enter the URL of the site you wish to link to.
    • Text to display: enter the link text here.
    • Title: enter information about where the link will send the user; this will aid user accessibility.
    • Target: select how the link should open, e.g. within the same window or in a new window.

7.  Section Link: e.g. to one of your other sections.

  • Type and highlight the text you wish to use as the link text or simply place your mouse where you want the link inserted. Select Insert Section Link from the WYSIWYG.
  • A window will pop up displaying the Site Structure; navigate to the section you wish to link to and click on it.

8. Content Link: e.g. to another attendee’s “Writing for the Web” content.

  • Type and highlight the text you wish to use as the link text or simply place your mouse where you want the link inserted. Select Insert Content Link from the WYSIWYG.
  • A window will pop up displaying the Site Structure; click on the section that contains the content you wish to link to; a list of content will be displayed.

9. Click Save changes to save the content once complete.

10. Preview your content to test your links.

Section Information

Section Information

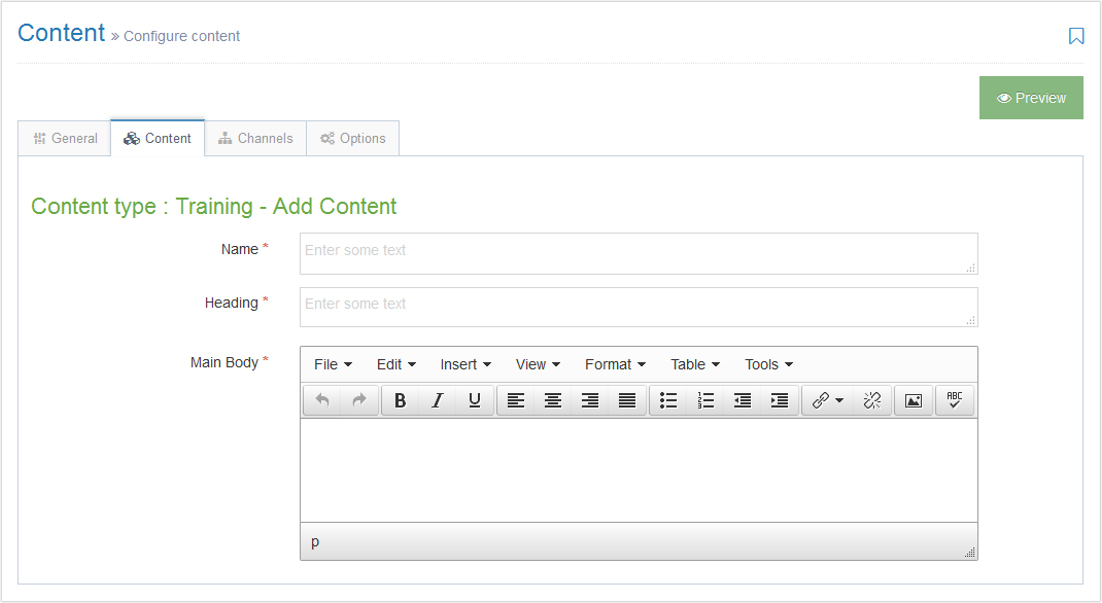
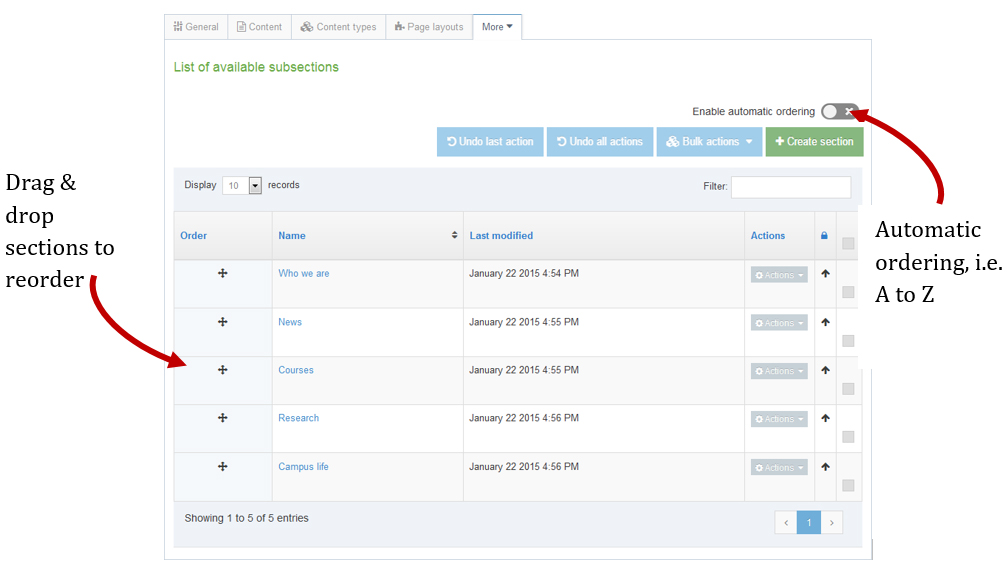
Sections are pages of your website and displayed in the Site Structure. When creating sections, the only required element is Name. The elements are all described below:

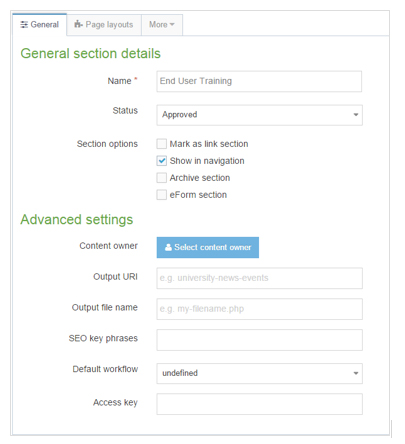
Name: this is the name of your section and is typically also used directly in the menu navigation.

Status: select Approved, Pending or Inactive.

  1. Approved sections will publish if they contain approved content.
  2. Pending sections will not publish.
  3. Inactive sections are marked for deletion and can be permanently deleted by an administrator.

Section options:

  1. Check Mark as link section, if the web page is a link elsewhere;
  2. Show in navigation is checked by default- if unchecked, the section will not appear in navigation and will be displayed in the site structure with a clear folder icon;
  3. Archive section— if content is no longer updated, a section can be set as an archive. This will save publish time, as the section will not be reviewed each time a publish is run.
  4. eForm section: check this box if eForms are going to submit to this section.

Content owner: select the user who “owns” the section. Content in the section will inherit this ownership, unless a different owner is specified for the content.

Output URI: lets you specify the Uniform Resource Identifier (URI) as the destination of the new section. If this field is left blank, the section’s name is used when publishing.

Output file name: enables you to specify a file name. If left blank, the default file name set in the channel is used. This can be used in conjunction with the Output URI in three possible ways (parent = section parent folder, currentsectionname = current section name, outputuri = current section output uri, filename.html= the new file name in the current section):

  1. and Output File Name results in a published page as follows: parent/outputuri/filename.shtml.
  2. Output File Name results in a published page as follows: parent/filename.shtml.
  3. Output File Name but with a name which is the same as the channel index name (in this case filename.shtml) results in the following: parent/currentsectionname/filename.shtml.

SEO key phrases: Enter comma separated key phrases and/or words. Make sure these match the content!

Default Workflow: select the workflow you wish to use for all content added to this section/branch.

Access key: lets you enter a single character, which may be used as a shortcut within a navigation menu. Allows a computer user to immediately jump to a specific part of a web page via the keyboard.
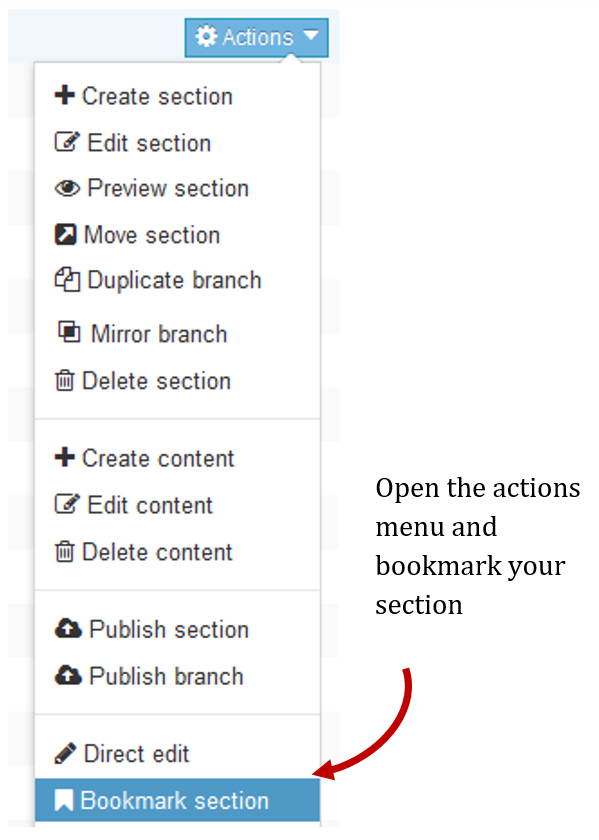
Training Outline: Basic Users

Training Outline: Basic Users

Click here to download the Basic User Training Document.
  1. Logging In
  2. Site Structure
  3. Section
    1. Information
    2. Section Icons
    3. How to’s:
      1. Add a section
      2. Move and reorder sections
      3. Bookmark sections
  4. Content
    1. Information
    2. Content Types
    3. History and Versions
    4. How to’s:
      1. Add content
      2. Direct Edit
      3. Links
      4. Tables
      5. Content Options
      6. Approve Content
  5. Media Library
    1. Information
      1. Media Items
        1. Image
        2. PDF documents
    2. How to’s:
      1. Add a Media Category
      2. Add Image
        1. Add Image Variants
        2. Edit Media Attributes
      3. Add PDF documents
  6. Mirror and Duplicate
  7. Deleting Assets
  8. Publish and Rsync
  9. Web Accessibility & SEO

Resources:

Logging In

Logging In

Our current version of T4 Site Manager is 8.3.8.1.

STEP 1: If you haven’t already, request T4 access from the UMC Digital team using this form.

STEP 2: To login, go to: LUC.edu/t4

STEP 3: Click the T4 Login button

STEP 4: Enter your UVID and Password

STEP 5: The T4 Site Manager will launch

Last Updated: 2.24.2023

Site Structure

Site Structure

The first part of building a website is identifying at least the high level architecture. In TERMINALFOUR this involves building a Site Structure consisting of sections (folders).


There are a variety of different types of sections. These are displayed with different folder symbols as displayed below.

Icon Name Description
Root section The first Section that displays on your Site Structure is your website’s homepage. On some sites, the home icon indicates their root section.
Normal section A page that is included in navigation;
NOTE: By default, newly created sections are included in the navigation unless you uncheck the box for “Show in navigation” in the Section Options.
Hidden section A page that is not included in the navigation
Pending section A page that is not ready to be published
Inactive section A deleted page
Internal link section A page that redirects to another page on your website
External link section A page that redirects to a page external to your website
Mirrored section A page that is a mirrored copy of another page on your website
How To: Move and reorder sections

How To: Move and reorder sections

Sections can easily be moved, and the order in which they appear in navigation will change to reflect this.

  • You can move one of your sections, using the drag and drop method.
  • You can reorder your sub-sections using either the automatic ordering or moving them manually.

How To Move and Reorder Sections

  1. To move a section, drag it with your mouse and drop it to the new location.
  2. Click confirm to save the change to the site structure.
  1. To reorder sections, click the site structure icon.
  2. From the actions menu    select edit section.
    • Select the more tab   subsections
    • If you wish to use automatic ordering, slide the box to the check position    and select a method. By default, all sections are locked. Unlock the sections you wish to apply automatic ordering to. To do this, use the unlock option in the actions menu.
    • If you wish to manually move the sections, use the move arrows to move sections around.
    • Click save changes before navigating away from this screen, as the changes will otherwise not be saved.
How To: Bookmark Sections

How To: Bookmark Sections

The bookmark tool allows you to add your favorite sections to a bookmark list.

How To bookmark sections

  1. Select bookmark section from the actions menu   beside the section you wish to bookmark.

  2. Check the bookmarks tool to see that your section has been added as a bookmark.

  3. Areas of TERMINALFOUR can also be bookmarked, by clicking on located towards the top right-hand-side of the screen.

Content Types

Content Types

Content is added to a section by using Content Types.


Content Types

Specific sections call for specific content types. See the lists below for content types available for your pages.

  1. Interior Pages
  2. Homepages
  3. Left or Right Columns
  4. Template Sections

Content Types for Interior Pages

Name Description Notes
Page Content Only Main template to add content to a page. This is used on most pages. Elements: Name*, Sub-Heading, Body*, Published Date, Tag/s
FAQ Box New Starts a list of frequently asked questions. Elements:

You can have multiple FAQ Boxes on a page but “Group ID” must be defined in order to group FAQ Items.

FAQ Item Creates a new question and answer in your FAQ list. Elements: Name*, Question, Answer, Image, Image Alt Tag, Image Title Tag, unique identifier, Group ID, Create Date

Create Date determines the listing order when FAQ Box New is used to group FAQ Items (most recent displays on top)

unique identifier must be defined to target the style for a specific content piece.

Image Used to embed an image to a page Elements:

Also used in template sections: site_logo and site_background

Infobox Used to highlight content on a page. Displays content in a gray box. Elements: Name*, Sub-Heading, Body
Panopto Video Embed Embeds a Panopto video on page Elements: Name*, Title, Panopto Video ID*, Blurb
Redirect Content Used only if you want to redirect a section that is included in navigation.
YouTube Video Embed Embeds a YouTube Video on page. Elements: Name*, YouTube Video ID*, Blurb, Label, Image

Content Types for Homepages

Name Description Notes
announcements Displays content in maroon bar on top of the site’s homepage Elements: (Name*, Title, Blurb, Link, External URL) limit Blurb to 240 characters

Used in section = home_announcement

Feature Link Elements:

Used in sections = home_news, home_top, home_center

Feature Story Elements:

Used in sections = home_news, home_top, home_center

Feature Blog Post Elements:

Used in section = home_news

Feature Content Elements:

Used in section = home_news

Feature Profile Elements:

Used in section = home_news

Feature Video Elements:

Used in section = home_news

Content Types for Left or Right columns

The following content types can be used in sections = home_leftinterior_left, home_right, and right_column

Name Description Notes
Feature Link Elements:
Feature Story Elements:
Feature Blog Post Elements:
Feature Content Elements:
Feature Multiple Links Elements:
Feature Photo Gallery Elements:
Feature Profile Elements:
Feature Video Elements:
Recruitment Links Elements:
Social Networking Feeds New Elements:
Social Networking Links Displays social media icons with links for Facebook, Twitter, and other Social Networking Accounts. Elements:

Content Types for Template Sections

Name Description Notes
Image Displays the Site Name when used in section = site_logo

Sets the background image for the section when used in section = site_background

Elements: Name*, Select Image, Select Link/Custom Link Text, External URL, Sub Head, Alt Tag

Site background image files are located in: Media Library » Categorised » site backgrounds

Organization Information Displays the site’s footer information. Elements: Name*, Email Address, URL, Street Address, City, State, Country, Postal Code, Phone Number

Used in: section = footer