There are numerous ways to add and modify content in TERMINALFOUR. One way is by using Direct Edit. To add a new piece of content, with internal and external links, follow the steps below.
Steps Adding Content and Links Using Direct Edit:
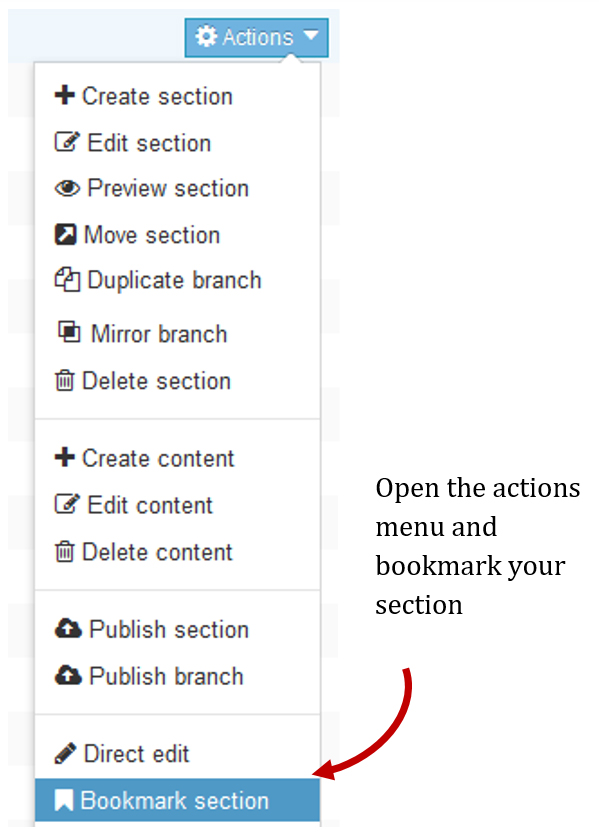
1. From the Site Structure screen, select Direct Edit from the Actions menu beside the section you just added content to.
2. A Direct Edit screen opens with dotted line surrounding any content for which you have editing rights. A Direct Edit menu is displayed to the left of the screen.
3. Click Insert content to begin adding new content to the page.
4. Select a Content Type.
5. Enter a Name for your content – we will now create a number of links.
6. External Link: e.g. http://www.terminalfour.com.
Type the text you wish to use as your link text; e.g. TERMINALFOUR.
Highlight the text; then select Insert external link from the WYSIWYG.
The Insert/Edit Link Window opens; complete the details as required.
URL: enter the URL of the site you wish to link to.
Text to display: enter the link text here.
Title: enter information about where the link will send the user; this will aid user accessibility.
Target: select how the link should open, e.g. within the same window or in a new window.
7. Section Link: e.g. to one of your other sections.
Type and highlight the text you wish to use as the link text or simply place your mouse where you want the link inserted. Select Insert Section Link from the WYSIWYG.
A window will pop up displaying the Site Structure; navigate to the section you wish to link to and click on it.
8. Content Link: e.g. to another attendee’s “Writing for the Web” content.
Type and highlight the text you wish to use as the link text or simply place your mouse where you want the link inserted. Select Insert Content Link from the WYSIWYG.
A window will pop up displaying the Site Structure; click on the section that contains the content you wish to link to; a list of content will be displayed.
9. Click Save changes to save the content once complete.
Look inside TERMINALFOUR’s comprehensive media library and see how easy it is to store and reuse images, videos and text across all your online channels.
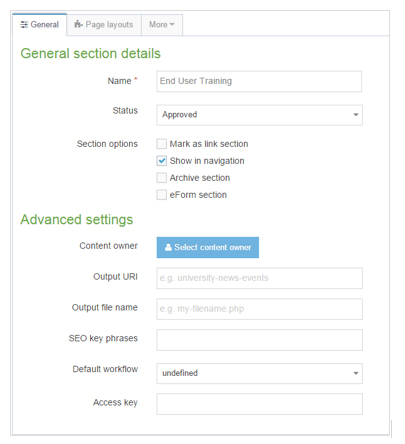
Sections are pages of your website and displayed in the Site Structure. When creating sections, the only required element is Name. The elements are all described below:
Name: this is the name of your section and is typically also used directly in the menu navigation.
Status: select Approved, Pending or Inactive.
Approved sections will publish if they contain approved content.
Pending sections will not publish.
Inactive sections are marked for deletion and can be permanently deleted by an administrator.
Section options:
Check Mark as link section, if the web page is a link elsewhere;
Show in navigation is checked by default- if unchecked, the section will not appear in navigation and will be displayed in the site structure with a clear folder icon;
Archive section— if content is no longer updated, a section can be set as an archive. This will save publish time, as the section will not be reviewed each time a publish is run.
eForm section: check this box if eForms are going to submit to this section.
Content owner: select the user who “owns” the section. Content in the section will inherit this ownership, unless a different owner is specified for the content.
Output URI: lets you specify the Uniform Resource Identifier (URI) as the destination of the new section. If this field is left blank, the section’s name is used when publishing.
Output file name: enables you to specify a file name. If left blank, the default file name set in the channel is used. This can be used in conjunction with the Output URI in three possible ways (parent = section parent folder, currentsectionname = current section name, outputuri = current section output uri, filename.html= the new file name in the current section):
and Output File Name results in a published page as follows: parent/outputuri/filename.shtml.
Output File Name results in a published page as follows: parent/filename.shtml.
Output File Name but with a name which is the same as the channel index name (in this case filename.shtml) results in the following: parent/currentsectionname/filename.shtml.
SEO key phrases: Enter comma separated key phrases and/or words. Make sure these match the content!
Default Workflow: select the workflow you wish to use for all content added to this section/branch.
Access key: lets you enter a single character, which may be used as a shortcut within a navigation menu. Allows a computer user to immediately jump to a specific part of a web page via the keyboard.
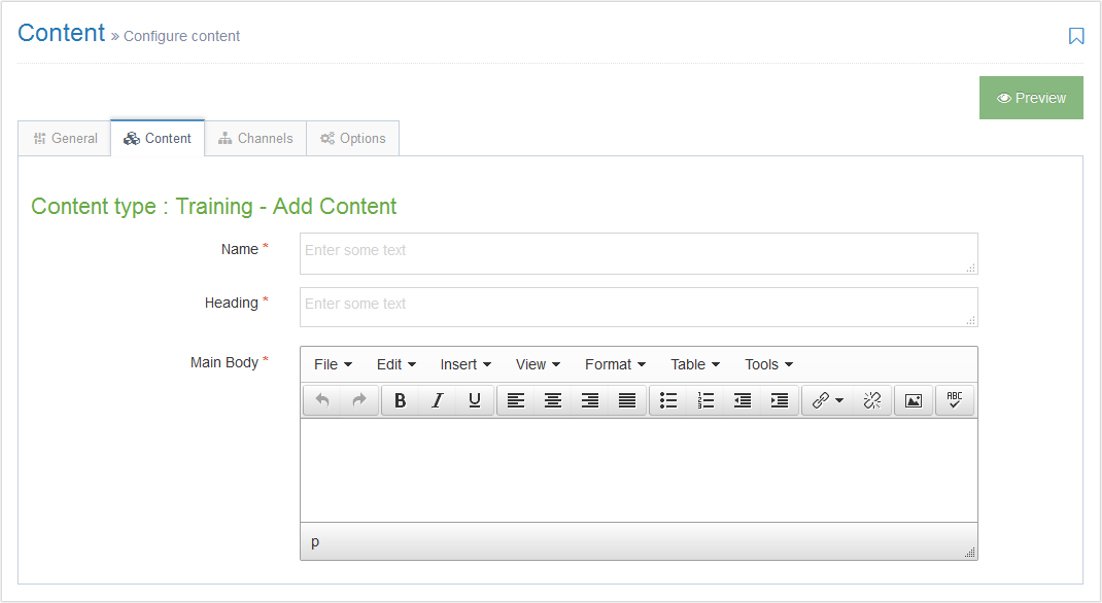
Select create content from the actions menu beside the section you wish to add content to.
If only one content type is enabled, this will open straight away. Alternatively you need to select the content type you want to use.
The * next to the element identifies that the element is required.
Enter a name for the content. This will not be displayed on the published page, but simply act as a name within TERMINALFOUR.
Use the Word file “Writing for the Web” and create a piece of content which looks as similar as possible to the original.
Open the Word file given to you by the trainer and copy the text.
Paste the text into the main body of your content. Some formatting may be necessary.
Preview to ensure you are happy with the result.
Click save changes to save the content once complete, or expand your options by clicking on the icon next to save changes to reveal options such as save & approve and save as draft. The drop-down menu options may vary depending on configuration.
Sections can easily be moved, and the order in which they appear in navigation will change to reflect this.
You can move one of your sections, using the drag and drop method.
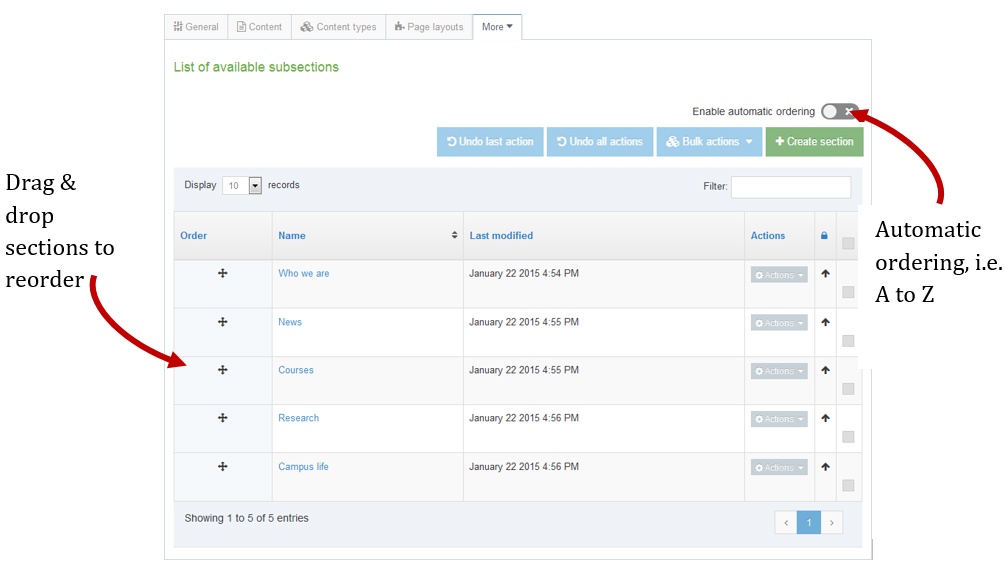
You can reorder your sub-sections using either the automatic ordering or moving them manually.
How To Move and Reorder Sections
To move a section, drag it with your mouse and drop it to the new location.
Click confirm to save the change to the site structure.
To reorder sections, click the site structure icon.
From the actions menu select edit section.
Select the more tab subsections
If you wish to use automatic ordering, slide the box to the check position and select a method. By default, all sections are locked. Unlock the sections you wish to apply automatic ordering to. To do this, use the unlock option in the actions menu.
If you wish to manually move the sections, use the move arrows to move sections around.
Click save changes before navigating away from this screen, as the changes will otherwise not be saved.

 How To Add A Section